Autopulse Resuscitation System: Difference between revisions
Jump to navigation
Jump to search
(Created page with "==Procedure Guidelines 9.00== ===AUTOPULSE RESUSCITATION SYSTEM=== ====INDICATIONS:==== The AutoPulse Resuscitation System Model 100 is used by trained personnel as an adjun...") |
|||
| Line 18: | Line 18: | ||
* AutoPulse Battery Charger | * AutoPulse Battery Charger | ||
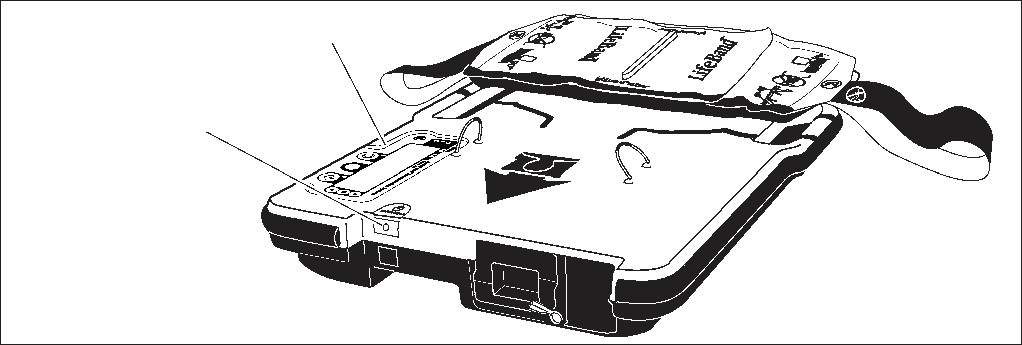
[[File:Autopulse.jpg]] | |||
====PROCEDURE:==== | ====PROCEDURE:==== | ||
Revision as of 02:05, 10 February 2012
Procedure Guidelines 9.00
AUTOPULSE RESUSCITATION SYSTEM
INDICATIONS:
The AutoPulse Resuscitation System Model 100 is used by trained personnel as an adjunct to manual CPR on adult patients in cases of clinical death, as defined by a lack of spontaneous breathing and pulse.
CONTRAINDICATIONS:
- Obese Patient weighs >300 lbs.
- Pediatrics
- Traumatic cardiac arrest patients (wounds resulting from sudden physical injury or violence)
SYSTEM COMPONENTS:
- AutoPulse platform
- LifeBand
- AutoPulse Battery
- AutoPulse Battery Charger
PROCEDURE:
- Initiate manual chest compressions at 30:2 or, 100/min for two minutes when an advanced airway has been inserted.
- Ventilate the patient per the current AHA CPR guidelines
- During the first two minutes of manual chest compression:
- Apply defibrillation pads to the patient’s bare chest
- Prepare the AutoPulse for use:
- Power up the device using the ON/OFF button located on the top edge of the device
- Make sure that no user advisory, fault, or system error messages display
- Open the Velcro LifeBand Chest Compression Assembly (CCA)
- After the initial 200 manual compressions (2 minutes) sit patient up by pulling the patient’s arms forward (use proper method when c-spine injury suspected)
- Make a single cut down the back of the patient’s clothing to remove
- Slide the AutoPulse device behind the patient and lower the patient down onto the device centering the supine patient laterally with the patient’s armpits just above the YELLOW line
- Close the LifeBand chest band around the patient’s chest
- Place the patient with the yellow alignment tab on top of patient’s chest
- Locate mating slot of other band and place on top of band already on chest. Press the bands together to engage and secure the Velcro® fastener. Make sure the bands are not twisted.
- If bands cannot be closed, use manual chest compressions
- Press and release the Start/Continue button once. The AutoPulse automatically adjusts the bands to the patient’s chest and determines the appropriate compression.
- Do not touch the patient or the LifeBand CCA while the AutoPulse is analyzing the patient’s size.
- Verify the patient is properly aligned and that the LifeBand CCA has taken up any slack in the bands.
- Press the Start/Continue button a second time to start compression cycles and the AutoPulse will begin chest compression cycles.
- Set the mode to either the pre-set compression-to-ventilations or continuous compressions option.
- Continue to monitor the placement of the patient on the AutoPulse after moving the patient or transporting to ensure proper alignment. Using Zoll approved restraints to secure the patient to the platform is recommended.
NOTE: Do not stop the device for more than 10 seconds after at least 2 minutes of compressions per the 2005 American Heart Association’s (AHA) CPR guidelines. Intravenous cannulation, endotracheal intubation, or any other procedure should either be attempted during chest compressions or during the 10 second pause. Approved alternatives to those procedures, such as intraosseous infusion and a BLS airway (example: King Tube) should be considered. Cardiac defibrillation should be attempted during a 10 second pause.
